Hazelcast Service
Purpose
Define a service to interface with a Hazelcast store.
")
Prerequisites
None
Configuration
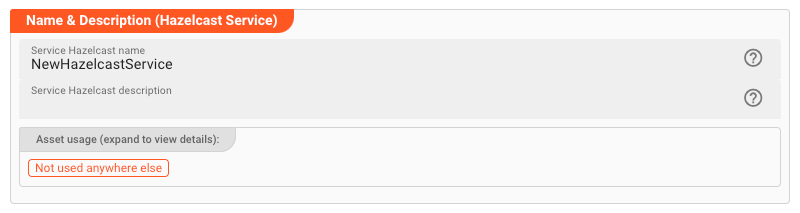
Name & Description
-
Name: Name of the Asset. Spaces are not allowed in the name. -
Description: Enter a description.
The Asset Usage box shows how many times this Asset is used and which parts are referencing it.
Click to expand and then click to follow, if any.
Required roles
")
In case you are deploying to a Cluster which is running (a) Reactive Engine Nodes which have (b) specific Roles
configured, then you can restrict use of this Asset to those Nodes with matching
roles.
If you want this restriction, then enter the names of the Required Roles here. Otherwise, leave empty to match all
Nodes (no restriction).
Instance
In this section, you will define all necessary parameters to connect to the Hazelcast store.
-
Instance Type: Select the type of Hazelcast instance you want to connect to. The following options are available:Client: Connect to a Hazelcast cluster as a client. This is the most common use case.Member: Connect to a Hazelcast cluster as a member. This is only necessary if you want to connect to a Hazelcast cluster as a member.
Currently only Client Instance supportedAt the moment, only the
Clientoption is supported. TheMemberoption will be supported in a future release. -
Instance Name: Enter the name of the Hazelcast instance you want to connect to. This is the name of the Hazelcast cluster you want to connect to.
Group Configuration
This is where enter the client username and password to connect to the Hazelcast cluster.
-
Group name: Enter the name of the Hazelcast group you want to connect to. -
Group password: Enter the password of the Hazelcast group you want to connect to. Check the Hazelcast documentation for more information on how to configure the group password.
")
Client Network Configuration
In this section, you define how to physically connect to the Hazelcast cluster. You have the following options:
-
Connection timeout [ms]: Enter the connection timeout in milliseconds. This is the time the client will wait for a connection to the Hazelcast cluster to be established. -
Connection attempt limits [attempts]: Enter the number of connection attempts the client will make to connect to the Hazelcast cluster. -
Connection attempt period [ms]: Enter the time in milliseconds the client will wait between connection attempts. -
Smart routing: Check this box to enable smart routing. Smart routing is a feature that allows the client to connect to a cluster member that is close to it. This is useful when the client and the cluster are in different data centers. -
Redo Operation: While sending the requests to related Hazelcast members, operations can fail due to various reasons. Read-only operations are retried by default. If you want to enable retry for the other operations, then check this box. -
IP Address: Enter one or more IP address(es) of Hazelcast cluster members you want to connect to.
")
Collection
In this section, you define the Hazelcast collections which you want to work with.
")
Collection Namespace: Enter the namespace of the collection you want to work with.
In the table, add the collections which you want to work with. Click Add Collection to add a new row to the table:
-
Name: Internal name of the collection. -
Type: Hazelcast Collection Type. OnlyMapis supported at the moment. -
Key Type: This is the type of the Hazelcast access key. Onlyjava.lang.Stringis supported at the moment. -
Hazelcast Name: This is the name of the collection in the Hazelcast cluster. -
Serialization Type: This defines how the data will be de-/serialized when read/written from/to Hazelcast. You have to select a format from the dropdown list, as well as the internal data type. The internal data type defines how the data will be represented in the workflow.-
Format:
-
Portable: This means that data read from this Collection will be deserialized from Portable format, and serialized to Portable format when written. You must have defined the portable format in thePortable Formatssection of the Asset below. -
Json: Same as Portable but in Json format.
-
-
Data Type: Select the data type from/to the data written/read from this Collection should be mapped. You can pick either an System data type (e.g.
Systen.AnyMap), or a data type which you have defined in the Service Types data dictionary below.
-
Automatically generated Functions
When defining a Collection, layline.io automatically creates four different functions for reading, writing and deleting data, as well as getting the size of the Collection.
| Function | Signature | Returns | Description | Example |
|---|---|---|---|---|
| Read | services.<Logical Service Name>.Read<Collection>(key) | Message or null if nothing found | Read data from the Collection. | services.MyHazelcastService.ReadCustomer(customer_id) |
| Write | services.<Logical Service Name>.Write<Collection>({Key: key, Value: {property1:value, property2: value, ...}}) | null | Write data to the Collection. | services.MyHazelcastService.WriteCustomer({Key: customer_id, Value: {Name: 'John', Address: 'MyAddress'}}) |
| Delete | services.<Logical Service Name>.Delete<Collection>(key) | Message or null if nothing deleted | Delete data from the Collection. | services.MyHazelcastService.DeleteCustomer(customer_id) |
| Size | services.<Logical Service Name>.Size<Collection>(key) | Number | Get the size of the Collection. | services.MyHazelcastService.SizeCustomer() |
As you can tell, a Collection name is simply prepended by Read, Write, and Size for the respective functionality.
Portable Types
Hazelcast supports the definition of your own serialization classes called Portable Serialization.
Please refer to Implementing Portable Serialization in the Hazelcast documentation.
")
Once you have defined your own Portable Serialization classes in Hazelcast, you can define a reference to them here. And once they are defined here, you can reference them in the Collection definition above.
Portable Type Namespace: Enter the namespace of the Portable Type you want to work with.
Now define as many Portable Types as you have defined within Hazelcast and which you want to work with within layline.io.
For this click on the dropdown box and select Add Portable Type:
Name: Internal name of the Portable Type.Factory ID: The Factory ID which you have defined for this Portable Type in Hazelcast.Class ID: The Class ID which you have defined for this Portable Type in Hazelcast.
Field definitions: Following in the table, define the fields which are defined within the Portable Type:
Name: Internal name of the field.Type: The type of the field. This is the type which you have defined for this field in Hazelcast.
Create additional Portable Types that you want to work with within layline.io.
Service Types
In this section, you define the data types which you wan to map Hazelcast Collections to/from.
The Data Dictionary allows us to define complex data structures which can be mapped onto Hazelcast Collections and vice versa. For this purpose, we need to define an internal custom data type which can receive the results of the statement, and/or which we want to insert/update within the Collection.
As an example, let’s do this for the above Collection Customer. What do we need here?
- The Collection contains a structure with three fields
ìd,nameandaddress. So we need three corresponding fields in our own data dictionary that we can map these results to.
Let's define the necessary custom data type using the data dictionary:
- Declare a new type
- Declare namespace (optional)
- Declare Sequence
Customer
1. Declare a new type (1):
")
2. Declare namespace
To better organize data types, we declare a namespace first (optional):
")
-
Name(1): The name of the element. If you are configuring a namespace, and you reuse the name of a namespace, which you have created elsewhere in this Project, then the elements of the namespaces will be merged into the namespace by this same name. Otherwise the name must be unique and may not contain spaces. -
Type(2): Pick the type of the element. In our example we first define a namespace. When we define additional elements under that namespace we will pick any of the other data types to actually hold the data. -
Description(3): Anything which describes the element further.
3. Declare Customer Sequence
Add a child to the namespace we just created:
")
- Click the small arrow next to the namespace name (1)
- Select
Add childto add a child element to the namespace - Fill in the details:
")
-
Name(1): Name the elementHistory -
Type(2): SelectSequenceas the element type. In the next step we will create individual members of the sequence. -
Extendable Sequence(3): Leave this unchecked for the example. If checked, it allows you and layline.io to dynamically extend the list of sequence members while working with the data type which we are defining. If - for example - your incoming data format has additional fields which are not defined in the sequence, the sequence will be automatically extended by these fields.
Now we add a list of member fields which make up the sequence:
")
To later reference the Name field, we can use the path MyNamespace.Customer.Name, and so forth.
Example: Using the Hazelcast Service
The Hazelcast Service can be used from within a JavaScript Asset. In our example we have a simple Workflow which reads a file with customer-related data (1), then in the next step (2) reads the corresponding customer data from a Hazelcast source, and simply outputs this data to the log. There is no other purpose in this Workflow than to demonstrate how to use the Service.
")
In the middle of the Workflow we find a JavaScript Processor by the name of “EnrichCustomer”. This Processor reads additional customer information from Hazelcast using the Hazelcast Service.
How is it configured?
Link EnrichCustomer Processor to Hazelcast Service
To use the Hazelcast Service in the JavaScript Processor, we first have to assign the Service within the JavaScript Processor like so:
")
-
Physical Service: The Hazelcast Service which we have configured above. -
Logical Service Name: The name by which we want to use the Service within JavaScript. This could be the exact same name as the Service or a name which you can choose. Must not include whitespaces.
Access the Service from within JavaScript
Now let’s finally use the service within JavaScript:
Reading from Hazelcast Source
Signature: services.<Logical Service Name>.<Collection>Read(key)
Example: services.MyHazelcastService.ReadCustomer(customer_id)
let hazelcastData = null; // will receive a message type
let customer_id = 1234;
try {
    // Invoke service function.
    hazelcastData = services.MyHazelcastService.ReadCustomer(customer_id);
} catch (error) {
    // handle error
}

// Output the customer data to the processor log
if (hazelcastData && hazelcastData.data.length > 0) {
    processor.logInfo('Name: ' + hazelcastData.data[0].Name);
    processor.logInfo('Address: ' + hazelcastData.data[0].Address);
} else {
    processor.logInfo('No customer data found for customer ID ' + customer_id);
}
Note how the Service function returns a Message as a result type.
You can find the results in message.data as an array.
If we are only expecting one row as a result, we can test it with hazelcastData.data.length > 0 and access the first row with hazelcastData.data[0].
Insert/Update to Hazelcast
Signature: services.<Logical Service Name>.<Collection>Write({Key: key, Value: {property1:value, property2: value, ...}})
Example: services.MyHazelcastService.WriteCustomer({Key: customer_id, Value: {Name: name, Address: address}})
let customer_id = 1234;
try {
    services.MyHazelcastService.WriteCustomer(
        {
            Key: customer_id,
            Value: {
                Name: name,
                Address: address
            }
        }
    )
} catch (error) {
...
}
Delete from Hazelcast
Signature: services.<Logical Service Name>.<Collection>Delete(key)
Example: services.MyHazelcastService.DeleteCustomer(customer_id)
let customer_id = 1234;
try {
    services.MyHazelcastService.DeleteCustomer(customer_id);
} catch (error) {
...
}
Get Collection Size
Signature: services.<Logical Service Name>.<Collection>Size(key)
Example: services.MyHazelcastService.SizeCustomer(customer_id)
let size = 0;
try {
    size = services.MyHazelcastService.SizeCustomer();
} catch (error) {
...
}
Service Testing
layline.io provides a test facility for testing your Services before you deploy them. In this way, you save time and effort by testing your Services without having to deploy and activate a whole Project with Workflows.
Once you have configured your Service(s), you can test them:
Within your Asset Configuration tab (1), switch to the Test tab (2) to test your Service.

Test Facility Toolbar
The toolbar provides the following options:

The Testing tab provides two major views:
- Testcase configuration: This is where you define the testcases to be executed.
- Testcase execution: This is where you can execute the testcases and see the results.
You switch between these two views by clicking on the leftmost icon in the toolbar (1).
Let's start with the Testcase configuration view.
Testcase Configuration
The concept of the Testing is to define a set of Testcases which can be executed in a batch or individually. For this purpose, you can define multiple Testcases and configure them individually. I.e. each Testcase groups a number of indidivual tests which can be executed individually or in a batch.
Adding a Testcase
Click Add Testcase in the toolbar to add a new testcase:

A new Testcase is added.
It is automatically named New<Service Asset Name>Test (3) and added to the list of Testcases (2).
Service test name(3): You can change the name of the Testcase here.Service test description(4): You can add a description to the Testcase here.
Test Case Setup
Basics
In this section you define the individual tests to be executed for this Testcase.
To start, click # END in the toolbar:

A new test is added to the list of tests (1), and the test is opened for configuration (2).

Next we fill in the details:
-
Test name(3): You can change the name of the Test here. -
Test description(4): You can add a description to the Test here. -
Service function to test(5): Select the Service function to test here.This list contains all Service functions which are defined in the Service Asset. Pick the one you want to test.

Once a Service function is selected, the system will automatically create a skeleton to fill in the respective parameters for the selected Service function.

Service Function Input Parameters
-
Service Function Input Parameters(6): Fill in the respective parameters for the selected Service function.In our example we have a function
GetAlertsForSitewhich takes two parametersbaseurlandriskId. If we click onAdd memberin the skeleton table the system will allow you to select the respective parameter from the list of available parameters:
Once you have selected the parameter, the system will automatically add the respective parameter name. You then add the respective value for the parameter:

Service Function Evaluation Parameters
To automatically evaluate the result, you can add a script which analyzes the results.
Testcase Execution
Once you have configured your Testcases, you can execute them.
There are two ways on how to trigger execution:
-
Option 1: Select
Run selected testin the toolbar (1) to execute the currently selected Testcase.
Executing a test this way will switch the tab to the Testcase execution view, execute the test and show the results.
-
Option 2: Switch to the Testcase execution view by clicking on the leftmost icon in the toolbar (1) select the test to execute, and then hit the
playbutton next to the test.
Each option will take us to the Testcase execution view:

In this view you can find the Testcase (1) and the Tests (2) we have created.
If we had created additional tests for this Testcase, they would be listed here as well.
Question marks indicate that the test has not yet been executed.
We can now either execute all tests, or run them individually:
-
Run all Tests(1): Click this button to execute all tests. -
Run Testcase(2): Click this button to a Testcase with all its underlying individual tests.
-
Run individual Test(3): Click this button next to a test to execute this individual test.
Once a test has been executed, the question mark will be replaced by a green check mark or a red cross depending on whether the test was successful or not.
The right hand-panel will show the results of the test execution respectively:

In case of errors, the system will show the error message for further investigation.
Please note, that the creation of the online documentation is Work-In-Progress. It is constantly being updated. should you have questions or suggestions, please don't hesitate to contact us at support@layline.io .