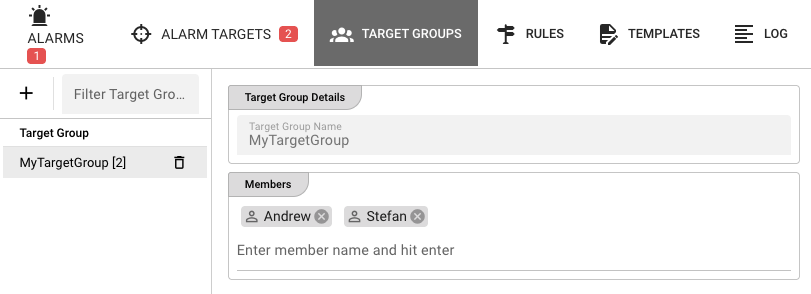
Target Groups
Target Groups let you organize multiple alarm targets into named collections. Instead of referencing targets one by one inside a rule, you can reference a single target group and notify all of its members at once.
Layout
The tab uses a vertical splitter:
- Left — Table of all target groups.
- Right — Details panel for the selected group.
Target groups table
The table has two columns:
| Column | Description |
|---|---|
| Target Group | The group name, followed by the number of members in brackets (e.g., on-call [3]). |
| Actions | A remove button appears for the selected group. |
Toolbar actions
- Add Target Group — Opens a prompt to name and create a new group.
- Filter Target Groups — Quick text filter by group name.
- Refresh — Reloads the group list from the cluster.
Adding a group
Click Add Target Group, enter a name, and confirm. The new group is created with zero members and is automatically selected.
Removing a group
Select the group and click the trash icon. You will be asked to confirm. Removing a group does not delete the underlying targets — it only removes the grouping.
If a rule references a target group you delete, that rule will no longer be able to resolve its recipients. Update or delete affected rules before removing a group.
Target group details
When a group is selected, the right panel shows two editable sections.
Target Group Name
The name of the group is displayed read-only. To rename a group you must delete it and recreate it with the new name.
Members
A chip input lists the current members of the group. Members are the names of individual alarm targets (not email addresses or user IDs).
- Add a member — Type the exact name of an existing target and press Enter.
- Remove a member — Click the
×on the member chip.
The member names must match target names exactly. If you mistype a name, the rule that uses this group will fail to resolve the target at runtime.
Saving changes
When you modify the member list, an Apply Changes button appears in the bottom-right corner. Click it to persist the changes to the cluster. If any member is empty or duplicated, validation will prevent the save.